How do I import a Sublime LMS ™ course export package?
In this lesson, you will learn how to import a LMS course export package.
Notes:
- Draft State settings are retained in course imports. If an assignment is unpublished as part of a course export, the assignment will also be unpublished in the course import.
- When importing a LMS course export package, the package will overwrite some of the existing course settings. For example, if your destination course is set up with a private copyright, and you import a package that has a creative commons (CC) copyright, the copyright license in the destination course will change from Private to CC. We suggest you revisit the course settings after any course import to make sure important settings are still in place.
- Courses are allotted 500MB quota for file storage. Administrators at your institution set the file storage quota for each course.
Open Settings

In Course Navigation, click the Settings link.
Import Course Content
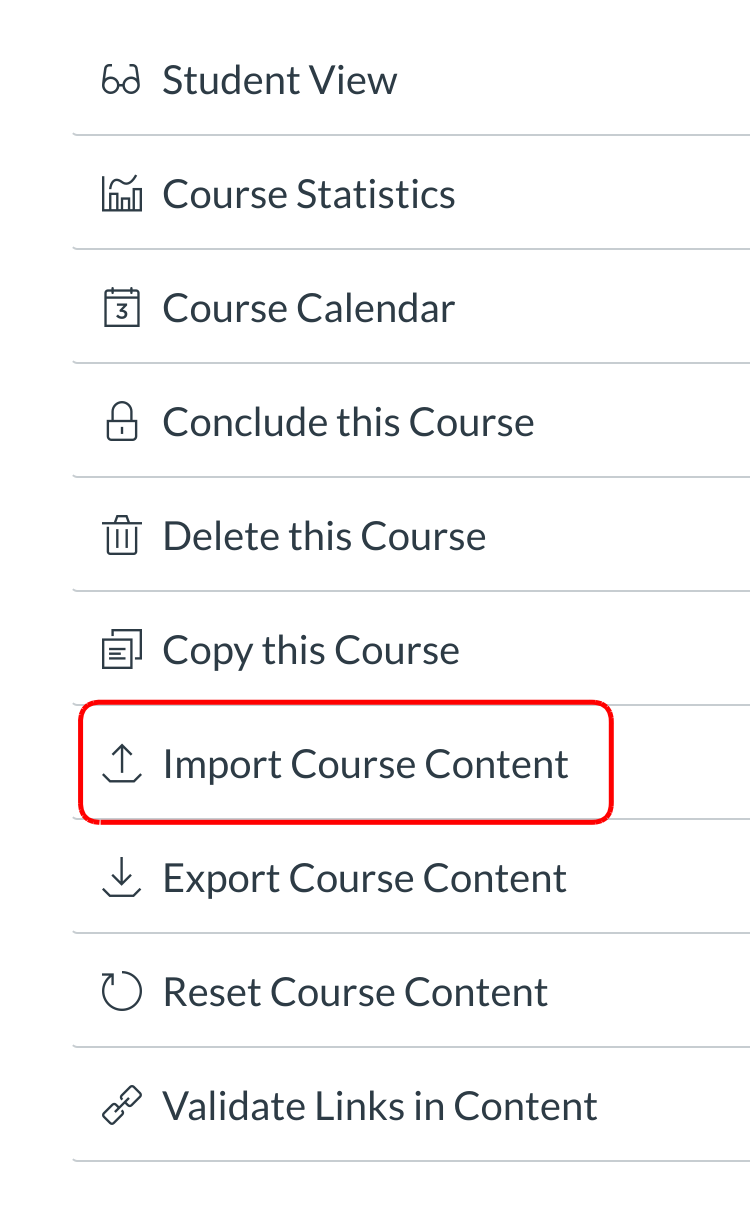
Click the Import Course Content button.
Choose Canvas Course Export Package

Choose the Canvas Course Export Package option from the Content Type drop-down menu.
Choose File

Locate the Choose File button to browse for your Canvas Course Export Package. A popup window will appear in your browser.
Open File

Choose the .imscc file you wish to import content from. Click the Open button to continue.
Select Migration Content

Click the All content radio button [1] if you want to import all of the content from the course. If you want to select specific content, click the Select specific content radio button [2].
Adjust Events and Due Dates

If you want to adjust the due dates associated with the course events and assignments, click the Adjust events and due dates checkbox. You have two options to choose from: Shift dates and Remove dates.
Click the calendar icon and select the beginning date of the course you are importing [1]. Select the new date you want the course to begin [2]. Then select the end date of the course you are importing [3], as well as the new date you want the course to end [4].
Create Date Substitutions

You can also explicitly define day substitutions to adjust for changing class schedules (i.e. move everything that was on Mondays to now happen on Tuesdays). To create a date substitution, click the Substitution button [1]. Use the drop-down menus [2] to select the days of the week. You can also remove Substitutions by clicking the X icon [3].
Import Course

Click the Import button.
View Current Jobs

The Current Jobs menu will display the status of your import. Running reports will display a menu bar with the time remaining to generate the report.
You will also receive an email notification when your import is completed.
Import statuses include pre-processing, queued, running, completed, and failed.
If you imported the course and selected specific content, LMS will ask you to select the content you want to import. Click the Select Content button.
Note: If you imported the course and did not select specific content, LMS will show any issues that occurred with the import. Click the issues link to view them.
View Course

The content from your course export package is now organized in your LMS course. Organize the content to fit your student's needs.